Introduction
Omnix aims to supplement the Nix CLI to improve developer experience. The project is developed on Github.

Install
To install Omnix, install Nix, then run:
# Install omnix (using om.cachix.org Nix cache)
nix --accept-flake-config profile install github:juspay/omnix

# Make sure that the `om` command works
om --help
Next Steps
Checkout the CLI commands available.
Discussion
For discussing Omnix, use Github Discussions or Zulip.
The om CLI
The Omnix CLI currently provides a fully-functioning ci and health commands. The show command has basic functionality, whereas the init command can be used to scaffold new projects using Nix. The develop command enriches flakes support when used with direnv.
om ci
om ci runs continuous integration (CI)-friendly builds for your project. It builds all outputs in the flake, or optionally its sub-flakes. You can run om ci locally or in an actual CI envirnoment, like GitHub Actions. Using devour-flake it will automatically build the following outputs:
| Type | Output Key |
|---|---|
| Standard flake outputs | packages, apps, checks, devShells |
| NixOS | nixosConfigurations.* |
| nix-darwin | darwinConfigurations.* |
| home-manager | legacyPackages.${system}.homeConfigurations.* |
A result symlink is also produced, containing a JSON of all built paths. See here.
Basic Usage
om ci run accepts any valid flake URL or a Github PR URL.
# Run CI on current directory flake
$ om ci # Or `om ci run` or `om ci run .`

# Run CI on a local flake (default is $PWD)
$ om ci run ~/code/myproject

# Pass custom arguments to `nix` after '--'
$ om ci run ~/code/myproject -- --accept-flake-config

# Run CI on a github repo
$ om ci run github:hercules-ci/hercules-ci-agent

# Run CI on a github PR
$ om ci run https://github.com/srid/emanote/pull/451

# Run CI only the selected sub-flake
$ git clone https://github.com/srid/haskell-flake && cd haskell-flake
$ om ci run .#default.dev

# Run CI remotely over SSH
$ om ci run --on ssh://myname@myserver ~/code/myproject
Results JSON and closure
Just like nix build, om ci will produce a result symlink that contains a JSON of all store paths built. Use options --out-link <PATH> and --no-link to control this behaviour.
As long as this symlink exists, your built paths will survive garbage collection, because the closure of this symlink contains the entire build closure.
Note that in order to include all build dependencies, you should pass --include-all-dependencies, viz.:
om ci run --include-all-dependencies | xargs cachix push mycache
The above command will push the entire build closure (runtime and build dependencies) to the given cache.
Using in Github Actions
In addition to serving the purpose of being a “local CI”, om ci can be used in Github Actions to enable CI for your GitHub repositories.
Standard Runners
Add this to your workflow file (.github/workflows/ci.yml) to build all flake outputs using GitHub provided runners:
      - uses: actions/checkout@v4
      - uses: DeterminateSystems/nix-installer-action@main
      - name: Install omnix
        run: nix --accept-flake-config profile install "github:juspay/omnix"
      - run: om ci
Self-hosted Runners with Job Matrix
Here’s a more advanced example that configures a job matrix. This is useful when you want to run the CI on multiple systems (e.g. aarch64-linux, aarch64-darwin), each captured as a separate job by GitHub, as shown in the screenshot below. It also, incidentally, demonstrates how to use self-hosted runners.
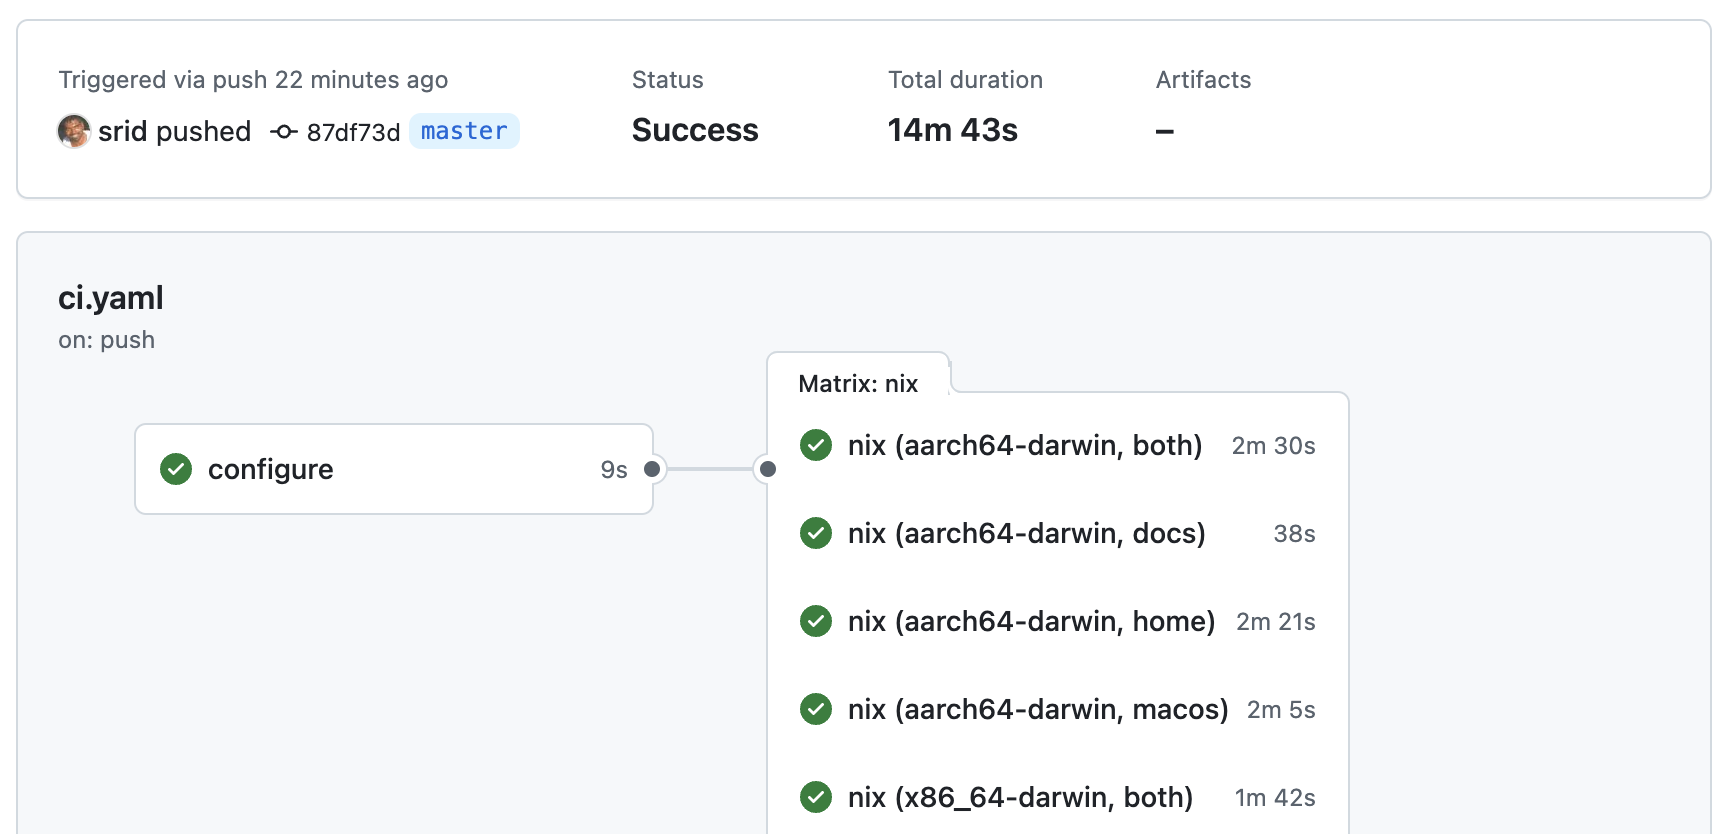
The om ci gh-matrix command outputs the matrix JSON for creating a matrix of job variations. An example configuration, using self-hosted runners, is shown below.
note
This currently requires an explicit CI configuration in your flake, setting om.ci.default.root.dir to ..
# Run on aarch64-linux and aarch64-darwin
jobs:
  configure:
    runs-on: x86_64-linux
    outputs:
      matrix: ${{ steps.set-matrix.outputs.matrix }}
    steps:
     - uses: actions/checkout@v4
     - id: set-matrix
       run: |
         set -euxo pipefail
         MATRIX="$(om ci gh-matrix --systems=x86_64-linux,aarch64-darwin | jq -c .)"
         echo "matrix=$MATRIX" >> $GITHUB_OUTPUT
  nix:
    runs-on: ${{ matrix.system }}
    needs: configure
    strategy:
      matrix: ${{ fromJson(needs.configure.outputs.matrix) }}
      fail-fast: false
    steps:
      - uses: actions/checkout@v4
      - run: om ci run --systems "${{ matrix.system }}" ".#default.${{ matrix.subflake }}"
tip
If your builds fail due to GitHub’s rate limiting, consider passing --extra-access-tokens (see an example PR).
Configuring
By default, om ci will build the top-level flake, but you can tell it to build sub-flakes (here, ./dir1 and ./dir2) by adding the following to your Om configuration:
# myproject/flake.nix
{
  om.ci.default = {
    dir1 = {
      dir = "dir1";
    };
    dir2 = {
      dir = "dir2";
      overrideInputs.myproject = ./.;
    };
  }
}
You can have more than one CI configuration. For eg., om ci run .#foo will run the configuration from om.ci.foo flake output.
Custom CI actions
You can define custom CI actions in your flake, which will be run as part of om ci run. For example, to run tests in the nix develop shell:
{
  om.ci.default = {
    root = {
      dir = ".";
      steps = {
        # The build step is enabled by default. It builds all flake outputs.
        build.enable = true;
        # Other steps include: lockfile & flake-check

        # Users can define custom steps to run any arbitrary flake app or devShell command.
        custom = {
          # Here, we run cargo tests in the nix shell
          # This equivalent to `nix develop .#default -c cargo test`
          cargo-test = {
            type = "devshell";
            # name = "default"
            command = [ "cargo" "test" ];
          };

          # We can also flake apps
          # This is equivalent to `nix run .#check-closure-size`
          closure-size = {
            type = "app";
            name = "check-closure-size";
          };
        };
      };
    };
  };
}
For a real-world example of custom steps, checkout Omnix’s configuration.
Remote CI
Omnix can run CI over SSH.
om ci run --on ssh://myname@myserver ~/code/myproject
What this does:
- Copy the flake source to the remote server, and run
om cithere - Copy the built paths back to local store
Options
- Pass
copy-inputs=trueif you wish to copy all flake inputs recursively. This is useful if you have private Git inputs. For example,om ci run --on "ssh://myname@myserver?copy-inputs=true" ~/code/myproject - Omnix copies the results back to local store, unless
--no-linkwas passed.
Examples
Some real-world examples of how om ci is used with specific configurations:
- omnix
- services-flake
- nixos-flake
- haskell-flake
- Here’s a blog post that talks about how it is used in haskell-flake
- superposition
- haskell-rust-ffi-template
What it does
- Check that the Nix version is not tool old (using
om health) - Determine the list of flakes in the repo to build
- By default, this is the root flake.
- The user can also explicitly specify multiple sub-flakes in
om.ci.defaultoutput of their root flake.
- For each (sub)flake identified,
om ci runwill run the following steps:- Check that
flake.lockis up to date, if applicable. - Build all flake outputs, using devour-flake1
- Then, print the built store paths to stdout
- If the
flake-checkstep is enabled (example), runnix flake check - Run user defined custom steps
- Check that
Support for flake-schemas is planned
See also
- github-nix-ci - A simple NixOS & nix-darwin module for self-hosting GitHub runners
- jenkins-nix-ci - Jenkins NixOS module that supports
nixci(predecessor ofom ci) as a Groovy function - cachix-push - A flake-parts module that provides an app to enable whitelisted pushing and pinning of store paths to cachix.
om health
The om health command checks the health of your Nix install. Furthermore, individual projects can configure their own health checks in their flake.nix. For example, the nammayatri project checks that the cachix cache is in use.
Checks performed
| Check | Configurable in flake.nix? |
|---|---|
| Flakes are enabled | - |
| Nix version is supported | Yes |
| Nix runs natively (no rosetta)1 | Yes |
Builds use multiple cores (max-jobs) | Yes |
| Nix Caches in use | Yes |
| Direnv: installed and activated | Yes |
| Dotfiles are managed by Nix | Yes |
| Min RAM / Disk space | Yes |
| Homebrew install detection (disabled by default)2 | Yes |
This check is only performed on macOS with Apple Silicon.
This check is only performed on macOS.
Note that some checks are considered non-essential. For eg., the disk space check looks for 1TB+ disk space, but if the user is on a laptop with 256GB SSD, the check will report a warning instead of failing. This can also be configured in per-project basis from flake.nix (see below).
Usage
om health
To run use the health check configuration specified in a project flake, pass that flake as an argument. For eg., to run halth checks defined from the nammayatri project, run:
# The argument can be any flake URL (including a local path)
om health github:nammayatri/nammayatri
Per-project configuration
To add project specific health checks or configure health checks, add the following to your om.yaml:
health:
  default:
    caches:
      required:
        - "https://ourproject.cachix.org"
To see all available configuration options, run om health --dump-schema. This will dump the schema of the configuration in JSON format. Convert that to YAML to see what can be added under the om.health.default key of your om.yaml.
$ om health --dump-schema | nix run nixpkgs#yq-go -- -P
This will output:
flake-enabled: {}
nix-version:
  supported: '>=2.16.0'
rosetta:
  enable: true
  required: true
max-jobs: {}
trusted-users:
  enable: false
caches:
  required:
    - https://cache.nixos.org/
direnv:
  enable: true
  required: false
homebrew:
  enable: false
  required: false
shell:
  enable: true
  required: false
Adding devShell check
You can automatically run om health as part of direnv invocation; see om develop for details.
Develop
The om develop command should be used indirectly in direnv, via the use omnix directive in your .envrc.
Getting started
-
Put this in your
.envrcfile:source_url \ https://raw.githubusercontent.com/juspay/omnix/2c80a2b228a8c21434172d2b4f3b8d2ee873284f/omnixrc \ 'sha256-WywFYSB50xlznsc/tkFAF18uI2pMNoTJJAJJUPs837Y=' watch_file om.yaml use omnix -
You should also create an empty (or fleshed out)
om.yamlfile in your project to avoid Nix evaluation:touch om.yaml
What does it do?
use omnix wraps use flake (of nix-direnv) providing additional capabilities:
- Run
om healthto check the health of the Nix environment.- Run
cachix useautomatically if the project uses cachix.
- Run
- Print a welcome text after spawning the Nix devshell.
The ideal goal here being that cd’ing to a project should do everything necessary to get you started immediately.
Welcome text
The welcome text can be configured in your om.yaml file. For example:
develop:
  default:
    readme: |
      🍾 Welcome to the **omnix** project

      To run omnix,

      ```sh-session
      just watch <args>
      ```

      (Now, as you edit the Rust sources, the above will reload!)

      🍎🍎 Run 'just' to see more commands. See <https://nixos.asia/en/vscode> for IDE setup.
Show
The om show command seeks to provide a better nix flake show experience.
warning
Currently, om show is a wrapper on nix flake show, but with support for flake schemas. More is planned for om show. See issue #162.
Usage
Run om show on any flake - via URL or local path.
$ om show github:srid/nixos-config
[..]
📦 Packages (nix build github:srid/nixos-config#<name>)
╭──────────┬───────────────────────────────────────────────────────╮
│ name     │ description                                           │
├──────────┼───────────────────────────────────────────────────────┤
│ activate │ Activate NixOS/nix-darwin/home-manager configurations │
│ update   │ Update the primary flake inputs                       │
│ default  │ Activate NixOS/nix-darwin/home-manager configurations │
╰──────────┴───────────────────────────────────────────────────────╯

🐚 Devshells (nix develop github:srid/nixos-config#<name>)
╭─────────┬──────────────────────────────────╮
│ name    │ description                      │
├─────────┼──────────────────────────────────┤
│ default │ Dev environment for nixos-config │
╰─────────┴──────────────────────────────────╯

🔍 Checks (nix flake check)
╭────────────┬─────────────╮
│ name       │ description │
├────────────┼─────────────┤
│ pre-commit │ N/A         │
╰────────────┴─────────────╯

🐧 NixOS Configurations (nixos-rebuild switch --flake github:srid/nixos-config#<name>)
╭────────────┬─────────────╮
│ name       │ description │
├────────────┼─────────────┤
│ gate       │ N/A         │
│ vixen      │ N/A         │
│ pureintent │ N/A         │
╰────────────┴─────────────╯

🍏 Darwin Configurations (darwin-rebuild switch --flake github:srid/nixos-config#<name>)
╭────────────┬─────────────╮
│ name       │ description │
├────────────┼─────────────┤
│ appreciate │ N/A         │
╰────────────┴─────────────╯

🔧 NixOS Modules
╭─────────┬─────────────╮
│ name    │ description │
├─────────┼─────────────┤
│ common  │ N/A         │
│ default │ N/A         │
╰─────────┴─────────────╯

🎨 Overlays
╭─────────┬─────────────╮
│ name    │ description │
├─────────┼─────────────┤
│ default │ N/A         │
╰─────────┴─────────────╯
om init
The om init command provides a better nix flake init experience. Specifically, it provides:
- a registry of flake templates that you can choose from
- support for template paramters that can be filled in by the user
To get started, run:
om init -o ~/myproject
This will prompt you to choose a template from the builtin registry (see below section), and then initialize it in the myproject directory.
Builtin registry
The builtin registry (stored in a flake) contains the following templates:
Initializing your own project templates
If your flake provides a om.templates output (see below section), then om init will recognize it. For example:
om init -o ~/myproject github:srid/haskell-flake
Because haskell-flake has a om.templates output, om init will prompt you to fill in the parameters defined in the template and initialize it.
You can also explicitly specify the template to choose from the flake:
om init -o ~/myproject github:srid/haskell-flake#haskell-flake
If there are multiple templates in the flake (as is the case with the builtin registry), omnix will the prompt the user to choose from them.
Configuration spec
Omnix templates can be defined by adding a om.template flake output configuration. This should be an attrset of templates. The value should contain the keys template (referring to original flake template) as well as params, defined as follows:
There are two kinds of params. String params are defined as follows:
{
  name = "package-name";
  description = "Name of the Rust package";
  placeholder = "rust-nix-template";
}
Here, when prompting for this param, the user-provided value if any will replace the given placeholder text across all files in the template.
Boolean params are defined as follows:
{
  name = "vscode";
  description = "Include the VSCode settings folder (./.vscode)";
  paths = [ ".vscode" ];
  value = true;
}
Here, if the user enables this param, the path globs specified in paths will be retained in the template. Otherwise, the paths will be deleted. The value key provides a default value; which key is supported for string params as well.
Both parameter types are distinguished by the presence of the relevant keys (placeholder for string, paths for boolean).
Testing templates
The configuration can also include a tests key that defines a list of tests to run on the template. Each test is an attrset with params and asserts keys that indicates the parameter values to test along with the path existance assertions. For example:
{
  tests = {
    default = {
      # systems = [ ]; # Optional whitelist of systems to limit this test to
      params = {
        username = "john";
        git-email = "[email protected]";
        git-name = "John Doe";
        neovim = true;
      };
      asserts = {
        # Path assertion tests under template output
        source = {
          # true means the path must exist; false means it must not exist
          "modules/home/neovim/default.nix" = true;
          ".github/workflows" = false;
        };
        # Path assertion tests under the output of a Nix package
        packages."homeConfigurations.john.activationPackage" = {
          "home-path/bin/nvim" = true;
        };
      };
    };
  };
}
Omnix Configuration
You can configure Omnix’s behaviour on your repository by creating a top-level om.yaml file. If there is no om.yaml file, Omnix will evaluate the flake’s .#om output instead. Prefer creating a om.yaml in general, as it is faster to read than evaluating complex Nix flakes.
note
For am example om.yaml, see that of omnix itself
Release history
1.3.0 (2025-07-15)
om ci: Allow impure builds throughimpure = true;setting inom.yaml(#445)om health- Fix DetSys installer hijacking its own version into
nix --versioncausing false Nix version detection. (#458) - Add homebrew check (disabled by default) (#459)
- Fix DetSys installer hijacking its own version into
1.0.3 (2025-03-17)
Fixes
om ci- Extra nix handling
- Allow
--override-inputto work again (#439) - Support
--rebuildby disallowing it in irrelevant subcommands (eval,develop,run,flake {lock,check}) (#441)
- Allow
- Extra nix handling
om init- Handle symlinks as is (we expect relative symlink targets) without resolution (#443)
1.0.2 (2025-03-11)
Fixes
om ci- Prevent bad UTF-8 in build logs from crashing
om ci run(#437)
- Prevent bad UTF-8 in build logs from crashing
1.0.1 (2025-03-10)
Fixes
om init- now copies over permissions as is (e.g.: respects executable bits on files) (#434)
- applies replace in proper order so that directory rename doesn’t skip content replace in its children (#435)
Chores
- Allow building on stable version of Rust (#427)
- Define ENVs in a single place and import them as default for all crates (#430)
1.0.0 (2025-02-17)
Enhancements
om develop: New commandom init- Initial working version of
om initcommand
- Initial working version of
om health- Display Nix installer used (supports DetSys installer)
- Display information in Markdown
- Remove RAM/disk space checks, moving them to “information” section
- Add shell check, to ensure its dotfiles are managed by Nix.
- Add
--jsonthat returns the health check results as JSON - Switch from
nix-version.min-requiredto more flexiblenix-version.supported.
om ci- Support for remote builds over SSH (via
--onoption) - Support for CI steps
- Run
nix flake checkon all subflakes (#200) - Ability to add a custom CI step. For example, to run arbitrary commands.
- Run
- Add
--accept-flake-config - Add
--results=FILEto store CI results as JSON in a file - Misc
- Avoid running
nix-storecommand multiple times (#224) - Locally cache
github:nix-systems(to avoid Github API rate limit)
- Avoid running
- Support for remote builds over SSH (via
Fixes
om ci run: The--override-inputoption mandatedflake/prefix (nixci legacy) which is no longer necessary in this release.om health: Usewhoamito determine username which is more reliable than relying onUSERenvironment variable
Backward-incompatible changes
nix-healthandnixciflake output configurations are no longer supported.om ci buildhas been renamed toom ci run.
0.1.0 (2024-08-08)
Initial release of omnix.